Setup Faust.js
Introduction#
In the previous tutorial, we learned how to create a basic React component that displayed a list of posts. In this tutorial, we'll setup Faust.js and configure the necessary plugins on WordPress to prepare your site for headless.
Installing Plugins on WordPress#
Install WPGraphQL#
We use the WPGraphQL plugin to transform WordPress into a GraphQL API that can be consumed by our Next.js app.
You can download and install WPGraphQL from the WordPress Plugin Directory.
Install WPE Headless#
The WPE Headless plugin ensures that your WordPress site runs smoothly as a headless CMS. This includes things like smart content redirects and enabling post previews.
To install WPE Headless, download the latest version and activate the plugin through the WordPress admin.
Setting Up Faust.js#
Now that your WordPress site is ready for headless, we can setup Faust.js in your Next.js app.
From the "Create Your First React Component" tutorial, you should have a directory structure that looks similar to this:
Installing Dependencies#
Start by installing the dependencies:
Prod Dependencies#
Dev Dependencies#
Create faust.config.js#
Create a faust.config.js file in the root of your project:
Create .env#
You'll also need a .env file to hold your environment variables:
Replace the NEXT_PUBLIC_WORDPRESS_URL value with the URL of your WordPress site. Additionally, grab the Headless Secret from WordPress Settings -> Headless and replace it with the WP_HEADLESS_SECRET value.

Configure GQty#
We use GQty as our GraphQL client. To configure GQty, we need to create a gqty.config.js file in the root of our project.
Now, we want to create the GQty client that is used to query data. Create a client/index.ts file and add the following:
Next, add the following generate script to your package.json:
The generate script will generate the GraphQL schema based on the structure of your WordPress site.
Before you can run the generate script, you'll need to temporarily enable "Public Introspection" from the WordPress admin -> GraphQL Settings:
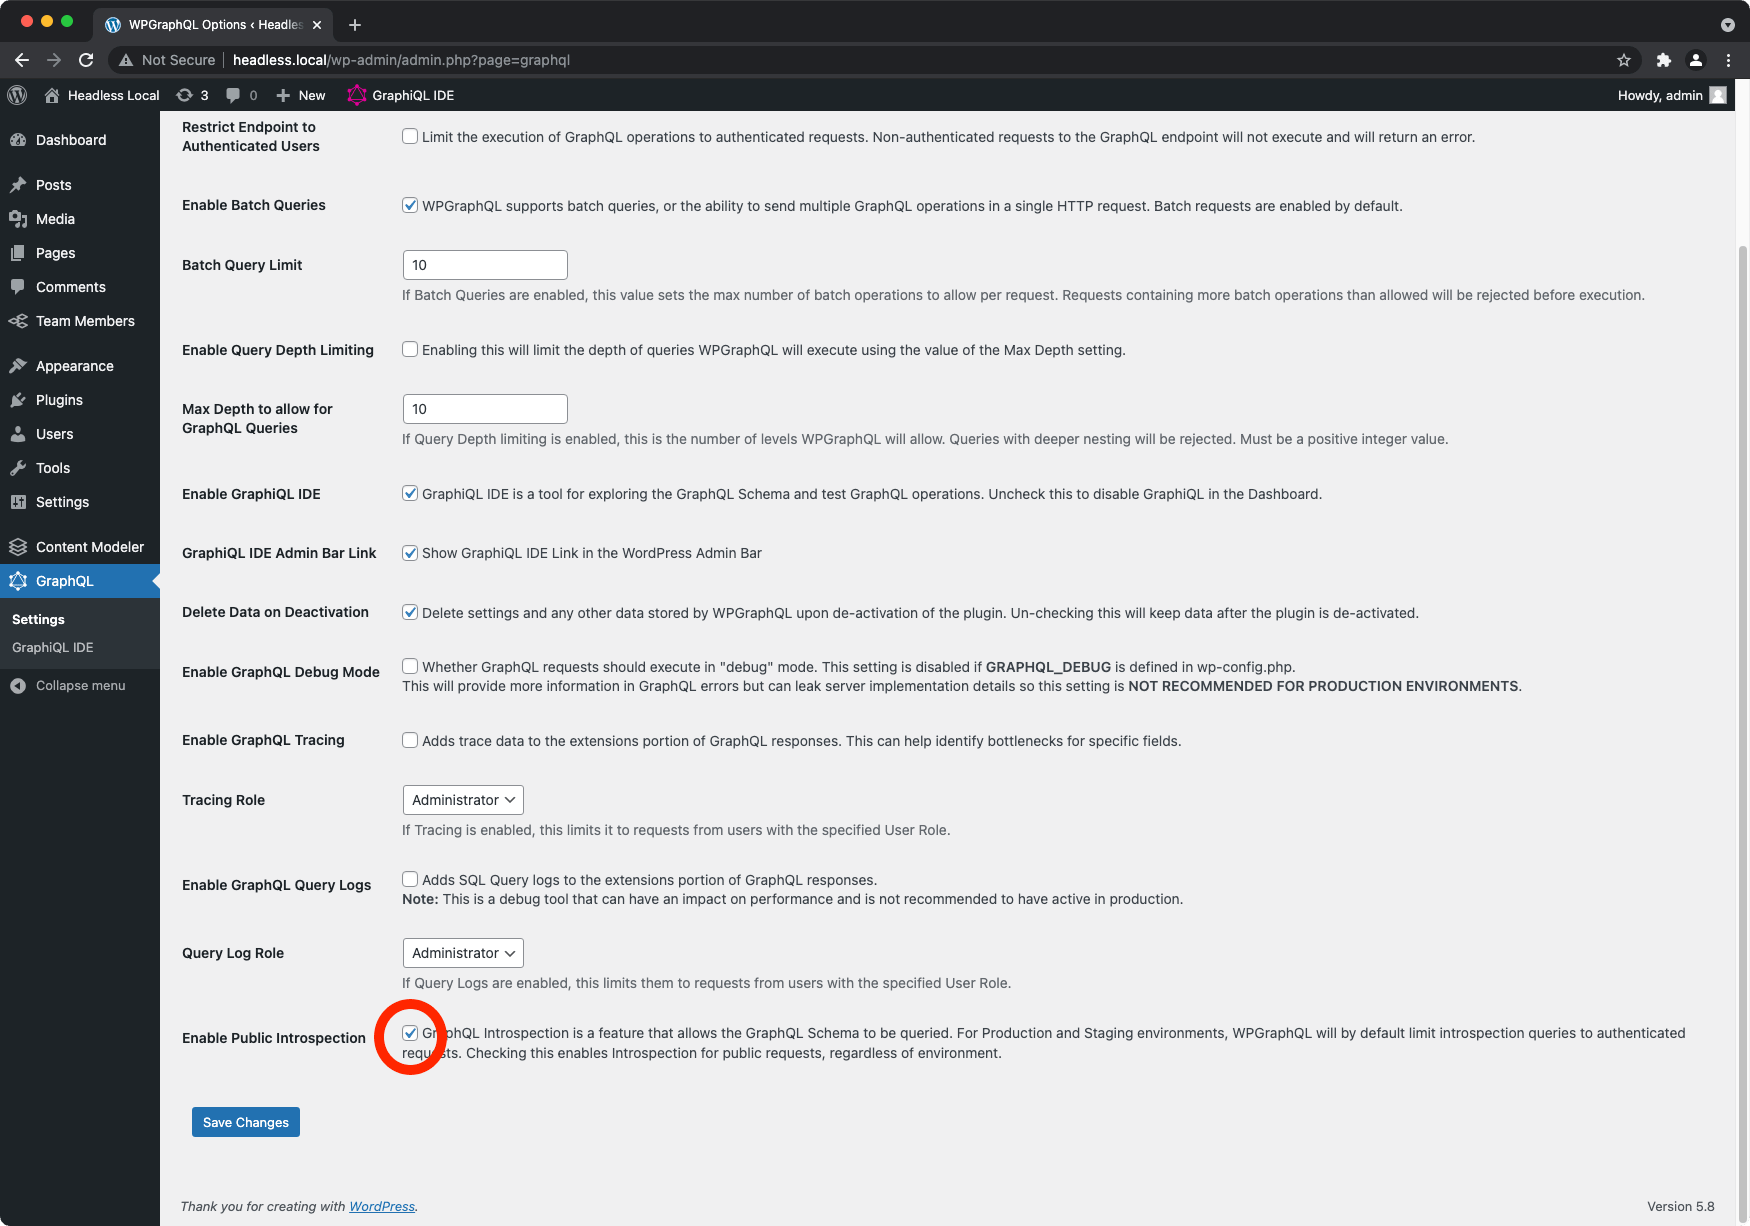
Finally, run the generate script:
Note: Once the generate script has ran, you can disable "Public Introspection"
The generate script will create a client/schema.generated.ts file upon completion.
Implement the <HeadlessProvider> Component#
The <HeadlessProvider> is a Higher-Order Component that wraps your Next.js app to provide Faust.js with the context needed for fetching data and caching.
Replace the existing pages/_app.tsx file contents with the following:
At this point, all of the necessary config is in place. Your app should look something like this:
What's Next?#
In the next tutorial, we'll demonstrate how to query data with Faust.js!